Nowadays, CI/CD is one of the minimum requirements of any kinds of software development projects. In this article, I am going to show how to build a CI/CD pipeline for AWS Lambda functions with CircleCI 2.0. We could apply the similar approach to deploy AWS services as well.
To start create the pipeline, we need the following resource:
- An AWS management account.
- A Github or Bitbucket account.
- A CircleCI account, which usually login through Github or Bitbucket.
- A Lambda Function in AWS.
- The Source code of the Lambda Function (my example is a java based AWS Lambda Function which is triggered by an Alexa Skill Kit).
Now let’s start to create our CI/CD pipeline from scratch.
Github/Bitbucket integration with CircleCI
-
First, we need to push our project to a Github or Bitbucket repository. I am using Bitbucket as I want to have private repositories for free.
-
Second, login CircleCI with the Github or Bitbucket account and integrated the project (Github Guide and Bitbucket Guide).
The most important thing in this step is that we created a config.yml file located at the .circleci folder in our project’s root path. When we push any change of our code to the git repository, we could see a new build triggered in CircleCI automatically. The following example does a maven build for my java project.
version: 2
jobs:
  build:
    docker:
      - image: circleci/openjdk:8-jdk-node-browsers
    steps:
      - checkout
      - restore_cache:
          key: <YOUR-PROJECT-NAME>-{{ checksum "pom.xml" }}
      - run: mvn dependency:go-offline
      - run: mvn clean package
      - save_cache:
          key: <YOUR-PROJECT_NAME>-{{ checksum "pom.xml" }}
          paths:
            - ~/.m2
Deploy AWS Lambda through CircleCI
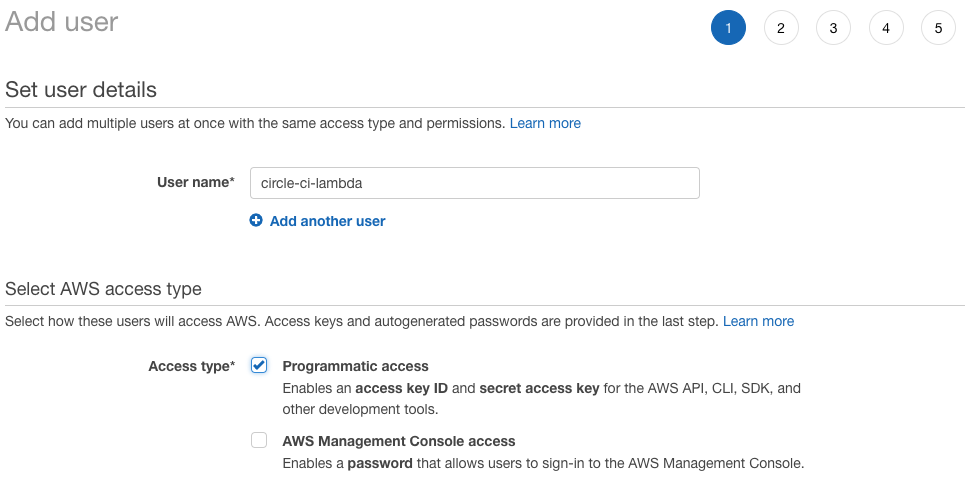
- First, create a robot user for CircleCI in aws. Login to AWS console, go to IAM service. Select Users tab on the left and then create a new user. Choice Programmatic access.
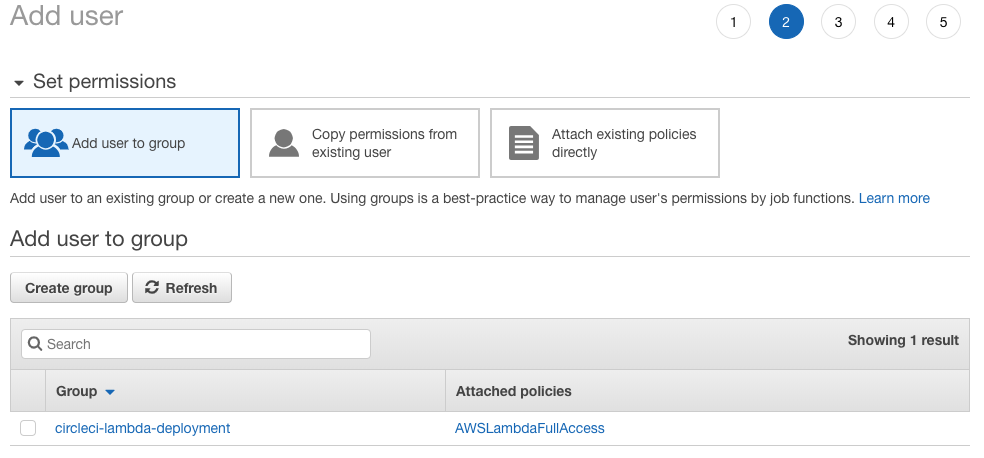
- Second, create a user group and attach
AWSLambdaFullAccessto this group as we are going to use this user account to deploy Lambda functions. Then, add the user to this group.
-
Thrid, after we created the user, we will get the AccessKey and Secret AccessKey. Make sure to keep these credentials safely as this is the only time they are visible to AWS users.
-
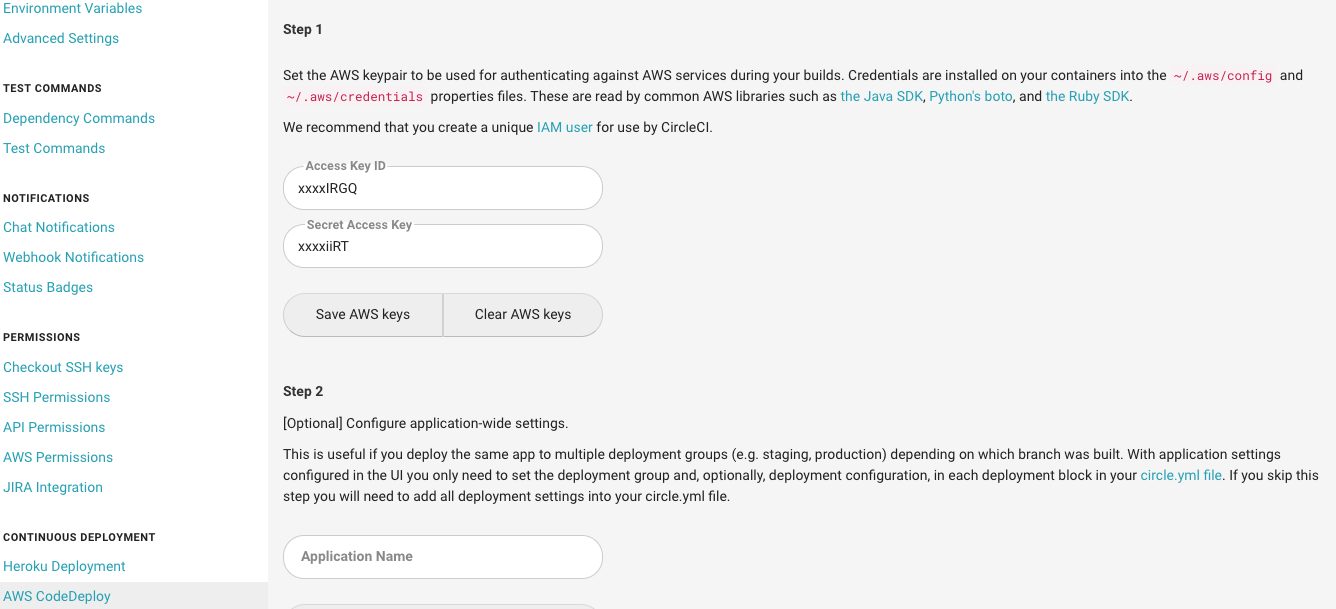
Fourth, go to the project settings in CircleCI. Select AWS CodeDeploy under CONTINUOUS DEPLOYMENT section on the left and paste the AccessKey and Secret AccessKey from step 3.
- Last, add the following steps in the
config.ymlfile in the project.
     - run:
          name: install awscli
          command: |
            sudo apt-get update
            sudo apt-get install -y python-pip python-dev
            sudo pip install awscli
      - run:
          name: deploy lambda
          command: aws lambda update-function-code --function-name <YOUR-LAMBDA-FUNCTION-NAME> --zip-file fileb://./target/<YOUR-BUILD-FILE> --region us-east-1
Now, when we push any changes to our git repository, our code will be built by CircleCI and deploy to the AWS Lambda function automatically.